
Intro
Being able to keep sensitive info under wraps and accessible in an emergency is becoming more and more important these days between fascism consolidating its power and the ever-present threat of climate disasters. Whether because of a hurricane, wildfire, or secret police, many of us will be forced from our homes at some point and need to leave things behind. Even when or where such concerns aren’t in your threat model, it can be useful to have an extra repository for all of your important information in case you lose or damage the primary storage space!
To that end it’s a good idea to create an encrypted flash drive(s) for emergencies. The drive is a safe place to keep back up copies of files as well as things that you don’t want to risk having in unsecured places.
Things like…
- Scanned copies of IDs, birth certs, & passports
- Important medical info
- A password manager like KeePassXC
- Digital keys for encrypting files and messages
- Emergency contacts
- Offline maps, literature and pirated movies (in case the internet is unsafe or inaccesible for some reason)
Whether you think you’ll need one or not, it’s better to be prepared than not! Elements of this process are all useful on their own and what you do with it is up to you! But having at least one emergency drive with the above contents is recommended! It’s important to stress to skeptical readers that these drives are inaccessible by just plugging them into a machine. Your documents will be safe against prying eyes or if you lose it!
Be aware, however, that the security of this process depends on the security of the operating system and computer used! It is therefore recommended to use Linux for this project and potentially everyday use! For maximum security, the version of Linux called TailsOS is recommended for this project but not everyday use.
What you’ll need
- 1 USB flashdrive
- 1 Personal Computer/Laptop where you have the ability to install new software
Making Partitions
A volume (or partition) on a flash drive or inside a computer is a unit for storing info. Your hard drive or solid-state drive has volumes on them. Usually there’s only one volume per drive but for the purposes of creating an encrypted volume, We’ll need to divide the drive’s capacity into 2 volumes. One volume will contain installation files for Veracrypt so that you can access it wherever you may need to, and the other volume will contain the actual encrypted space.
This process is different for each operating system, so we’ll break it down into sections for you.
Windows 10
First, go down to the taskbar, type out “partition” in the search area, and click on “Create and format disk partitions.” The following window will pop up.
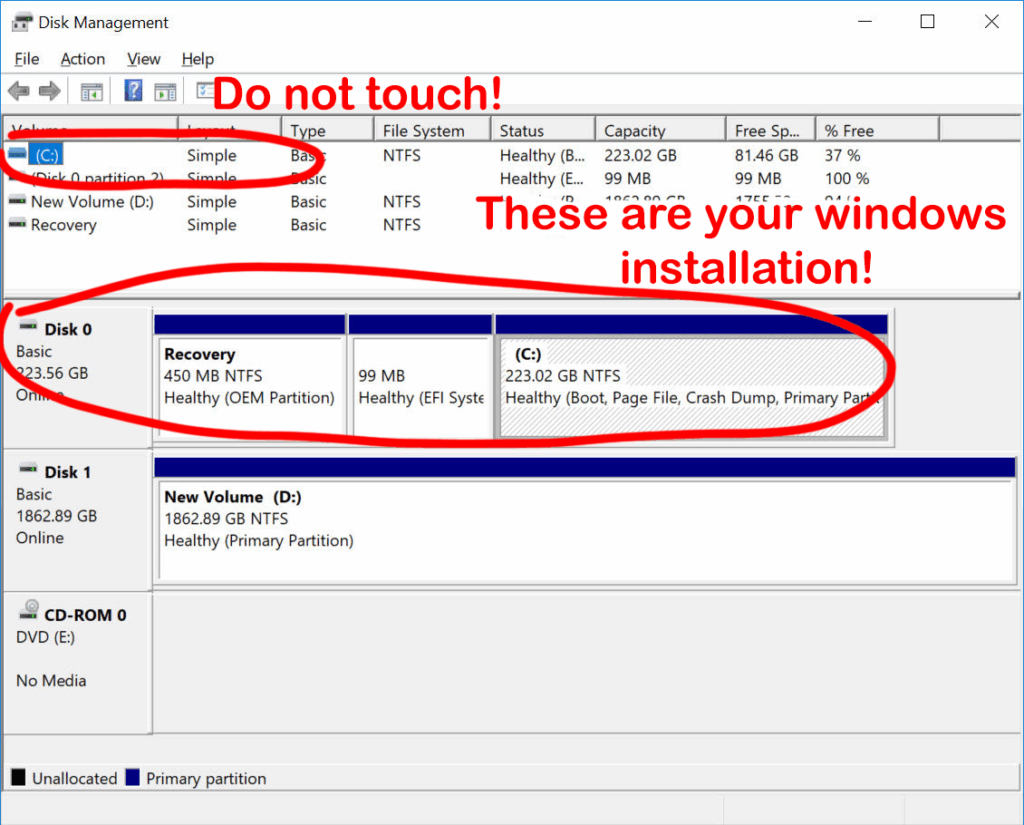
When you plug in your flash drive, it’ll pop up in this window as a new disk with a letter assigned to it. Right click on the volume bar associated with it. Click on “shrink volume.” If for whatever reason that’s greyed out, just delete the volume for now and skip the next paragraph.
When shrinking the volume, a window will pop up asking how much you want to shrink it by in megabytes. We only need maybe a few gigs on the primary partition for this project. So, for example, if you’re using a 64gb drive, you’ll want to shrink it by 50,000 – 54,000 mb.
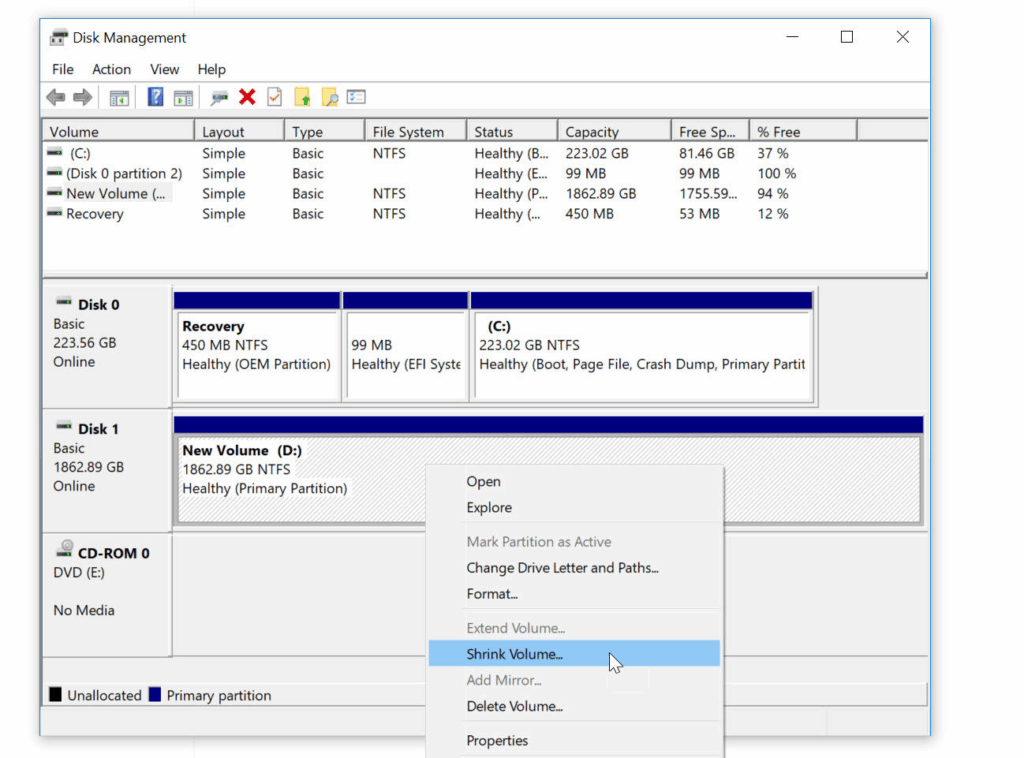
Now we need to fill the vacuum we just created with a new partition. Right click on the black bar that says “unallocated” and select “New simple volume.” When the activity window pops up, you want the “allocation unit size” to be ‘default’ and the “File system” to be “exFAT.” It might default the format to “NTFS” but we don’t want that because it’s a proprietary windows format that doesn’t really work for flash drives. You can also name the new partition, which could come in handy later on!
Click ‘next’ and the system will build your new partition!
Mac
Partition creation on Mac is fairly straightforward. Open up your spotlight search by pressing command+space and use it to open up ‘Disk Utility’. The app interface should show you a list of drives on the left with an info readout in the main window area. Click on the flash drive you want to partition and then click on “partition” up near the top right of the window. The partition icon should look like a pie chart.
A new window should pop up with a big pie chart. Below that pie chart are two buttons and you should click the one labelled with a plus sign. When the next popup shows, click on “Add Partition.”
Now that you have two partitions on your flash drive, we need to adjust the sizes. Along the outer edge of the pie chart, you should see a little white dot. Click and drag it until one partition measures about 10 gigabytes. Now it helps to name these partitions, so that you can easily identify them later! Once ready, click ‘Apply’ at the bottom and then ‘Partition’ in the confirmation popup!
Linux
For this part I’ll be using Ubuntu. For other distros, this may be a different process. open your app menu from the taskbar and click on the folder named “utilities.” There should be a program called “Disks.” Open this up. Just like with windows, it’ll show you all the physical drives plugged into your system, and when you click on them it’ll pull up the partitions on them.
Select your flash drive and then the main partition on it. On the bottom right of the partition menu, there should be a red button with a white dash on it. Click that to delete the partition. Now that you have a blank slate, click the ‘+’ on the other side of the interface to create a new partition following the pop up. For this project we need one partition of 10 gb, and another one taking up the remaining space. You’ll also be able to name your partitions which is recommended so you can identify them later on.
Veracrypt
Now that we have our volumes, we need to encrypt the larger one. To do this we need a program called “Veracrypt.” Go to the website (link provided in the last section of this zine) and download two files: the EXE Installer for your operating system, and the ‘portable’ version under the windows section. Will the portable version work on other platforms? Probably not but it doesn’t hurt to have it. At that rate you should grab the installers for the other 2 platforms (Linux and Mac) just in case. The encrypted volume we’re making will only be accessible using veracrypt, so you need to have it around wherever you plan to open this drive.
Once you install veracrypt and open it up, it’ll be a bit overwhelming and easy to get lost.
Creating a Volume
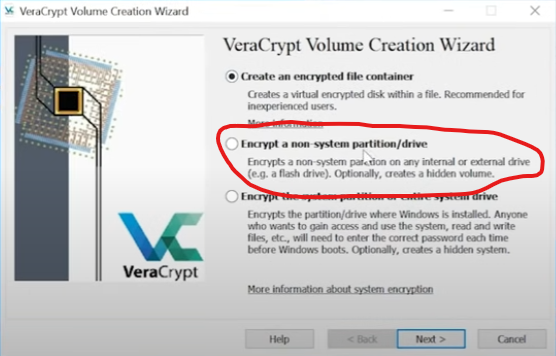
Start by clicking the ‘create volume‘ button underneath the file-list looking area. This’ll bring up a new window to handle the process. The first set of options presented determines the type of encrypted volume to be created. Select “Encrypt a non-system partition/drive“ and click ‘next‘. Veracrypt will ask for admin permissions at this point, and you’ll need to click yes and allow this.
Selecting the Volume
The next step will ask if you want a standard or hidden volume. Standard will do for now so click ‘next‘. Now we need to select the volume we created previously. This part can be a bit tricky because the interface isn’t very forthcoming about which device is which and you need to know what to look for a bit. We’re trying to encrypt a large portion of a flash drive, so it’ll list the flash drive in its entirety as a “Removable Disk.” Under ‘Removable Disk‘, there will be two other options labelled with file addresses, names, and their sizes.
Select the partition from that pair that contains the larger size and click ‘next‘. Following from the earlier example of a 64gb drive, I would choose the partition with 54gb instead of the 9 or 10 gb partition.
The next step asks if we want to “Create encrypted volume and format it” or “Encrypt partition in place.” Encrypting in place takes the files that already exist in the space we selected and preserves them during encryption. Formatting will erase the existing files on the drive. We don’t have any files on that volume yet so we could do either, but formatting is both faster and just a good idea to do anyway. Now click ‘next‘.
The following two steps are choosing the encryption formulae and size to encrypt. The default formulae (AES and SHA) are plenty good so click ‘next‘. Since we’re encrypting a full partition, the options for sizing should be greyed out. If not, make sure that it’s set to encrypt the total size of the volume, and click ‘next‘.
Password and Creation!
Now we need to set the password! Enable ‘display password‘ to make this part easier. It’s important to create a memorable, complex, and lengthy password for this. Something that you can memorize without writing down!
Professionals recommend using Diceware, which is a programming technique for randomly generating numbers or phrases. If for whatever reason you choose to forego this method, we recommend using a sentence that’s vague or confusing to anyone but yourself. Something with a meaning that’s unique to you and isn’t readily apparent to others (even those close to you if possible). Make sure it’s as lengthy as you can handle, and at least 5-7 words!
We cannot write down this password ANYWHERE!
Doing so compromises the security of the device! Another professional recommendation that’s often made is using numbers and the special symbols on those same keys.
When you’re ready, click ‘next‘! If it throws up a warning window, you can brush it aside. The next step will ask if you intend to store large files on the device. click ‘yes‘ and then ‘next‘.
Now it’s time to format! Veracrypt will now want to collect randomness (sometimes called “entropy”) via mouse movements. Keeping your cursor within the volume creator window, jiggle your mouse around as much and as randomly as you can! A bar at the bottom of the window will start to fill up and you’ll want to keep jiggling until it’s full. Once it is, click ‘Format‘!
Now it’ll start to actually create our encrypted volume! It might throw up some warning windows, but those are just precautions and you can press onward. This stage might take a while depending on how powerful your computer is so get up, stretch, grab a drink, and be patient. After a while, it should pop up with a window saying the volume was created, and the larger creation window should move to the final slide. At this point you can click ‘exit‘!
Mounting
Now we should practice using this volume with veracrypt! You’ll notice now that the volume is encrypted, it no longer shows up in your file explorer. Or, if it does show up, you can’t access it and you might get prompts to format it. This is normal!
In order to use our encrypted volume, we need to go into veracrypt and “mount” it. Start by selecting a letter in the top half of the window that isn’t occupied. I recommend choosing letters that come after ‘C’ or ‘D’ because those are typically reserved for the operating system and main storage devices. Then in the bottom half, click on ‘select device‘ and a window should pop up with a list of partitions (just like earlier during the creation process). Remember what you named the partition? Otherwise it should still be under ‘Removable Disk‘ as the larger of the two options.
Now that we have a letter assigned and our volume selected, click ‘Mount‘ on the bottom left. A window will pop up prompting you for your password. Click ‘ok‘ and give it a bit to decrypt. Your file system should now be showing a new drive!
When you’re done using your volume, make sure you go back into veracrypt before unplugging it! Select the volume up top, then click ‘Dismount‘ on the bottom left! Once dismounted, you can eject the flash drive like normal and then pull it out!
Further Reading and Resources
- Veracrypt installers
- It Could Happen Here Podcast
- Episodes from 3/30/2025 & 4/06/2025
- Turn Off Your Phone! (Zine)
- KeePassXC
- GnuPG Encryption